

This is the second of a four-part playthrough of a voyage from Zheng He. The prior article covered the basic rules of the game, setup, and the first turn. We had just arrived in the port of Champa, in modern-day Vietnam.
Turn 2:
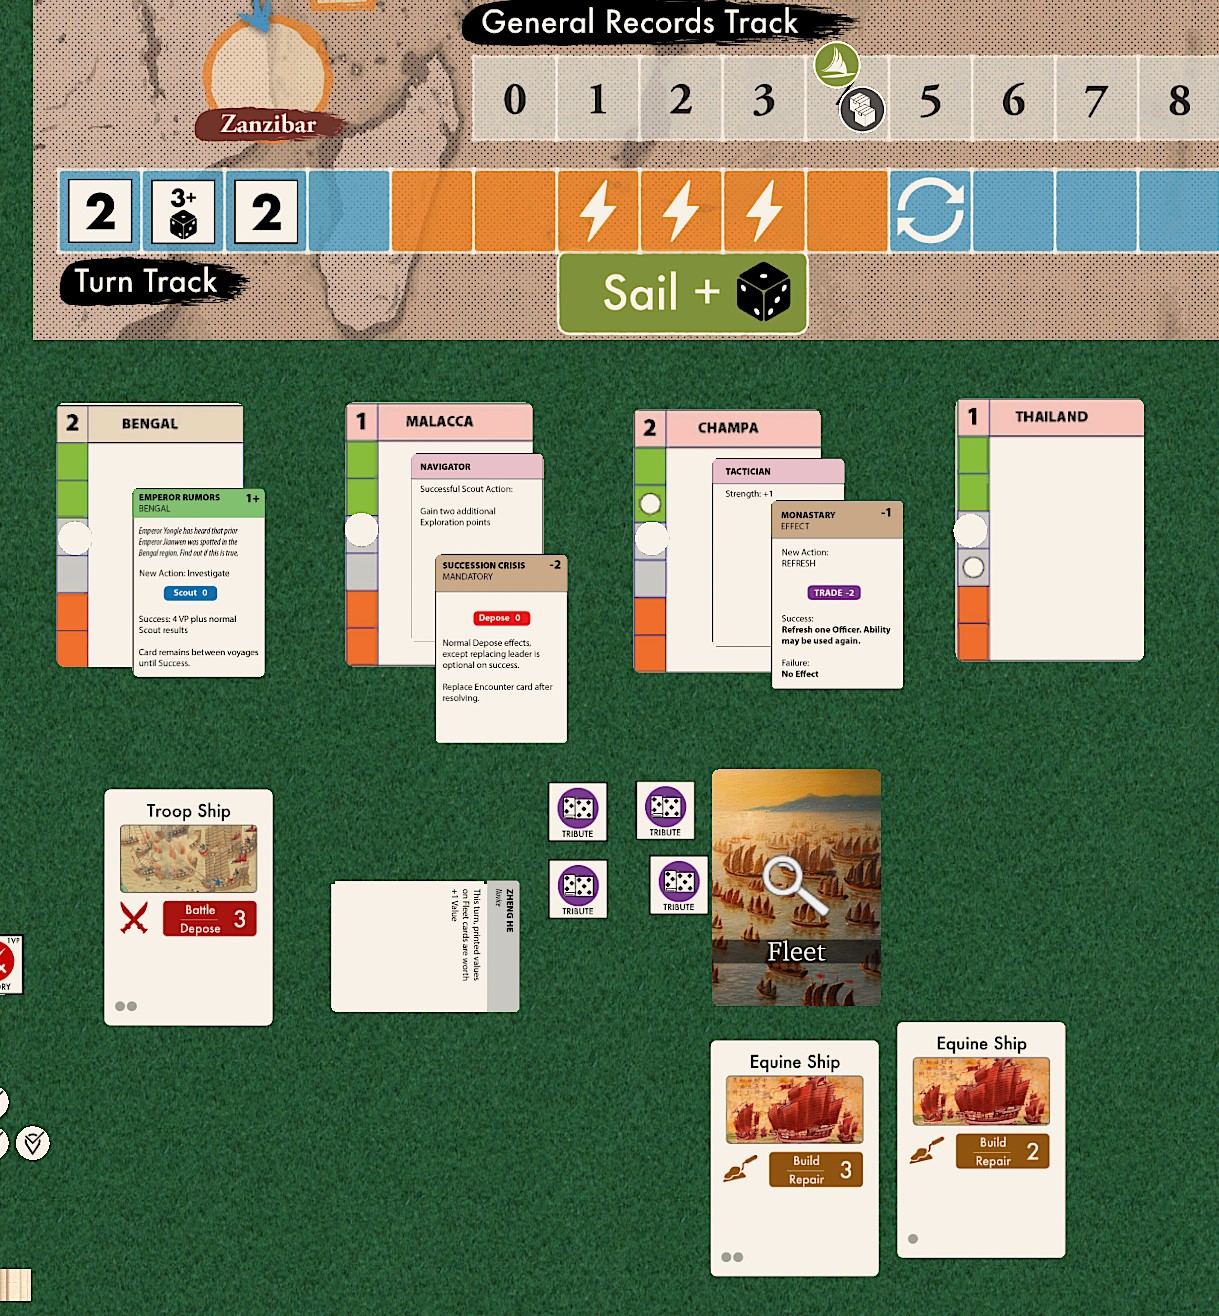
To start things off, I draw the Tianfei 3+DR, one of the worst Tianfei chits. I could stay and Negotiate to try to increase relations back into the green, but I only have one card with Negotiate. I need at least three Negotiate to have a chance of success—with the DR I should probably do 4. So I’d need to use three cards, which seems like a lot at this stage. Plus I want to hold onto my Battle/Depose cards for Malacca.
So instead, I’m just going to sail to Malacca. I decide to expend cards totaling 5 Sail, even though the target will be 5 plus a die roll. Fingers crossed, although taking on some damage wouldn’t be too terrible now.
If you fail the Sail action, you add Damage cards equal to the shortfall to your discard pile. However, you still end up at your chosen destination.
Roll is a zero, so we make it unscathed. We arrive at Malacca. My end-of-turn card draw is an Equine ship, which helps with building. I’m running low on cards, so I’ll probably be spending a few turns here in Malacca refitting.
But first, we need to deal with the Succession Crisis. Let’s hope for a low Tianfei draw…
Turn 3:
Tianfei: 2(!)
This is really good for me; I could even try to push and do a double-action turn. The Depose will be a 3 (2 for Tianfei, +1 for the strength of Malacca—upper left of Province card), but there’s a -1 card modifier. If I play both my Depose cards, that’s five, so I succeed on a 0 or 1 DR. Then I have one card left for the build, which is a build 3. Again, I’d succeed on a DR of 0 or 1.

However, if I fail either of those, things won’t be great. Failing the Depose means the relations of the Port drop to zero, the other Ports in the region also drop relations, and I take damage. Depose is a high risk/high reward Action. And if I fail on the base, I will have to take a zero action turn probably for the next two turns to rebuild my hand.
If I only do the one action turn, I guarantee the depose. But then I may get a bad Tianfei next turn.
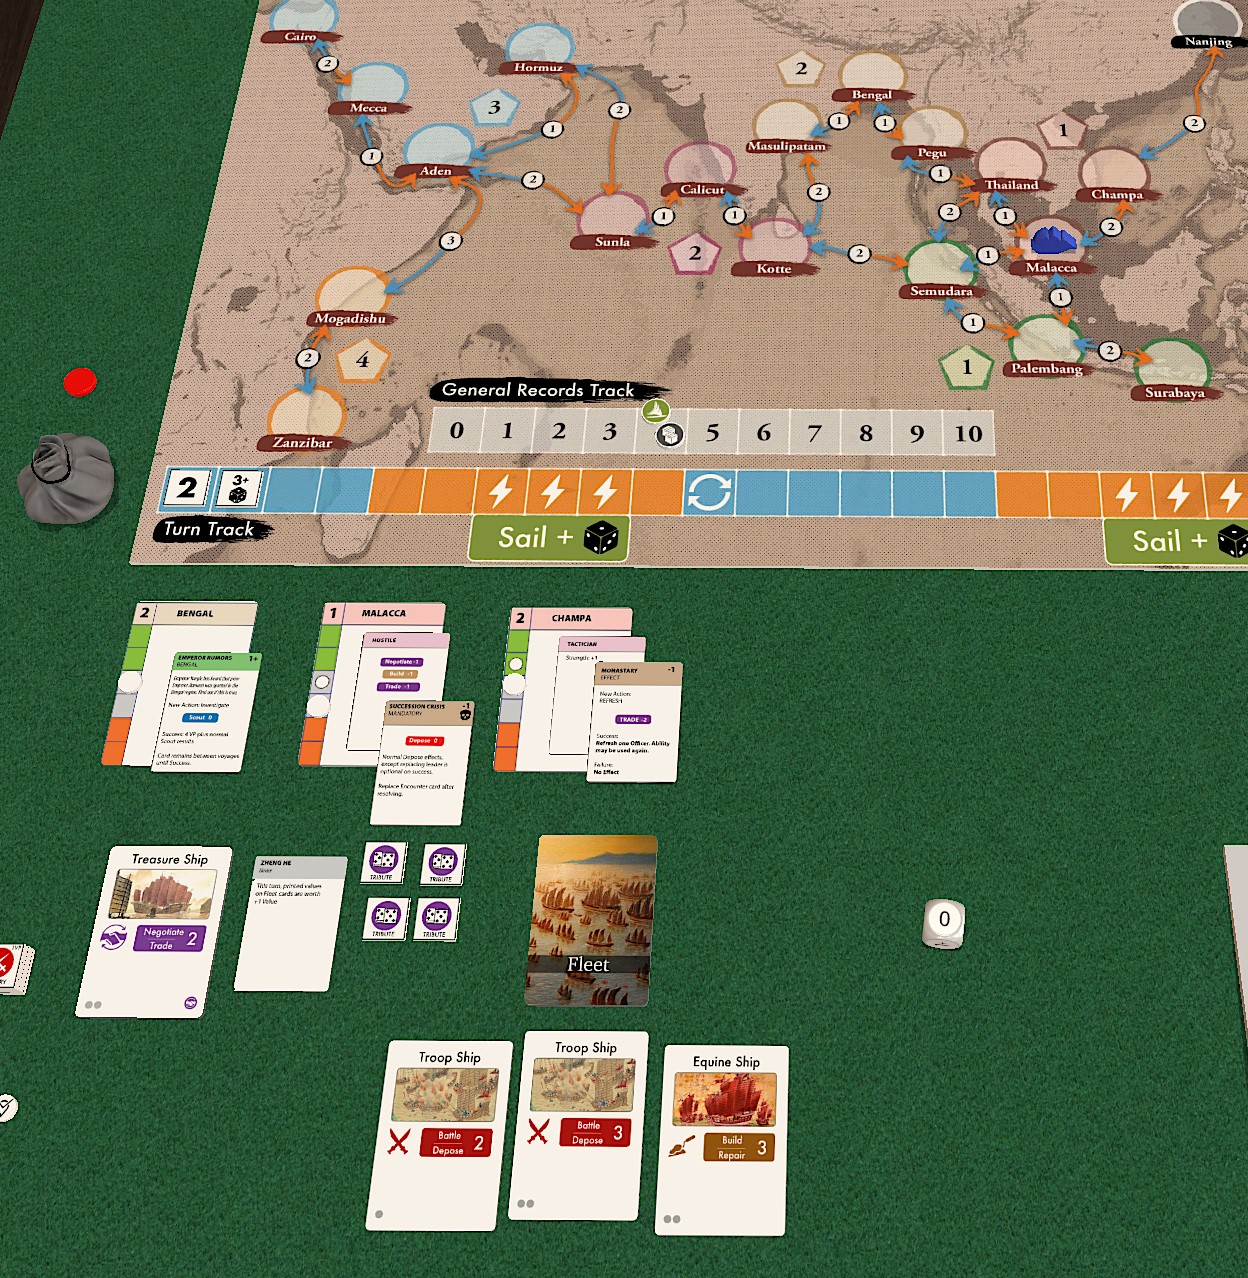
OK, I’m going to go with the double-action turn. But to make things a tad safer I’m going to use Zheng He’s special officer ability, which increases the printed card values by one (he doesn’t increase the intrinsic ‘1’ value every card has for non-printed ratings). I’m using it pretty early, but it seems like a critical turn. I guess I could even sail back to Champa to refresh him at the Monastery there.
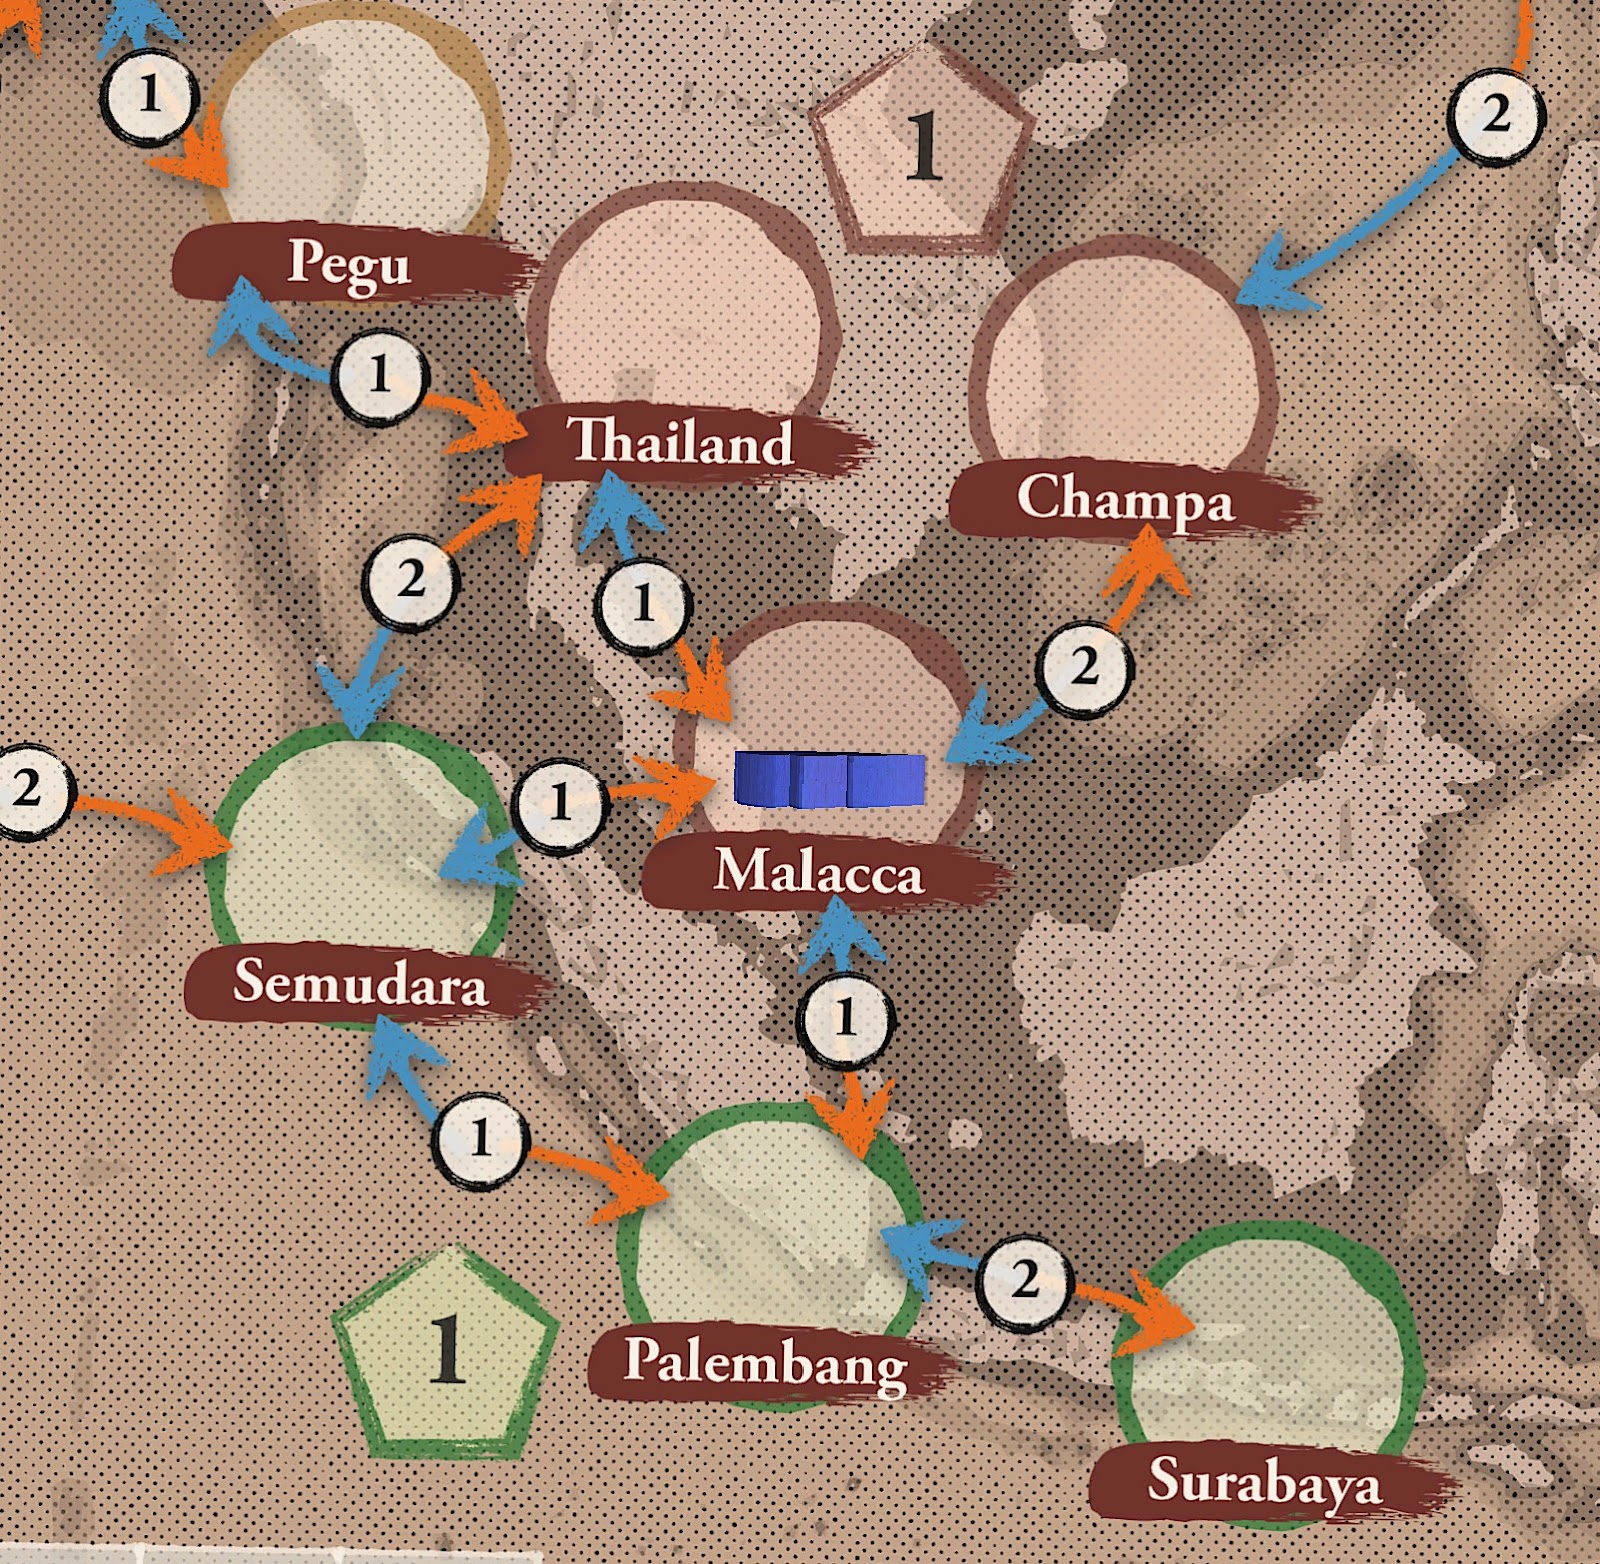
Action 1 – Depose: I play the Depose 2 and the Depose 3, for a card total of 7 (since each card is +1 from Zheng He). Target = 2+DR. DR is a zero (again!). Zheng He was not needed for this!
Malacca goes to max good relations, and Thailand also goes up a box (since strength is the same or lower than Malacca). Champa relations do not change—they are not impressed, since their strength is 2, higher than Malacca.
The strength is shown in the upper left of the Port box. On a successful Depose Action, other Ports in the same Region with equal or lower strength improve Relations by one box.
I also take a Victory token (1 VP).
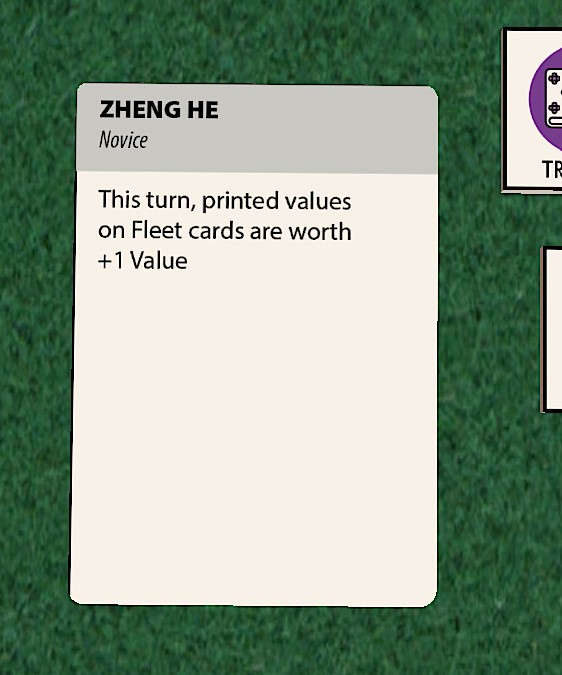
A special condition of the Port card is that I don’t have to replace the leader, like a normal Depose. But I choose to, since he’s Hostile.
NOT GOOD. Navigator is a great leader for Malacca. If I Scout I get extra Exploration which will really help. But I am not ready for another Succession Crisis. Plus I have to reduce relations by 2, which puts Malacca back into the gray.
I guess the Malaccans were NOT happy about me coming in and installing a new leader.
Action 2 – (?): Succession Crisis is Mandatory, which means my next action must be that. If I do my second Action, it must be to resolve the Succession Crisis. However, the only card I have left for that is the Equine Ship, and I don’t want to use that. You must use at least one card to do an action, even if you know you will fail. So I decide to skip the second Action.
I draw another Equine ship card at the end of the turn.
Turn 4:
Tianfei: 2/3/4 (Malacca is Neutral Relations, so 3)
I can’t do the zero action option, since there is a Mandatory event. Instead, I will just do a single action and use the Build 2 card (which I can use a Depose 1—every card can always be used as a ‘1’ for any action). I will fail the action. I could do a double turn here and hope to roll a zero for the Build Action to get my base (with the Build 3 card), but that seems reckless.
I fail the Depose Action. Malacca drops down to the bottom of the relations track, and Thailand and Champa both go down one box. I also take 1 Damage card and place it in discards, since Malacca is Strength 1.
The Encounter card is discarded.
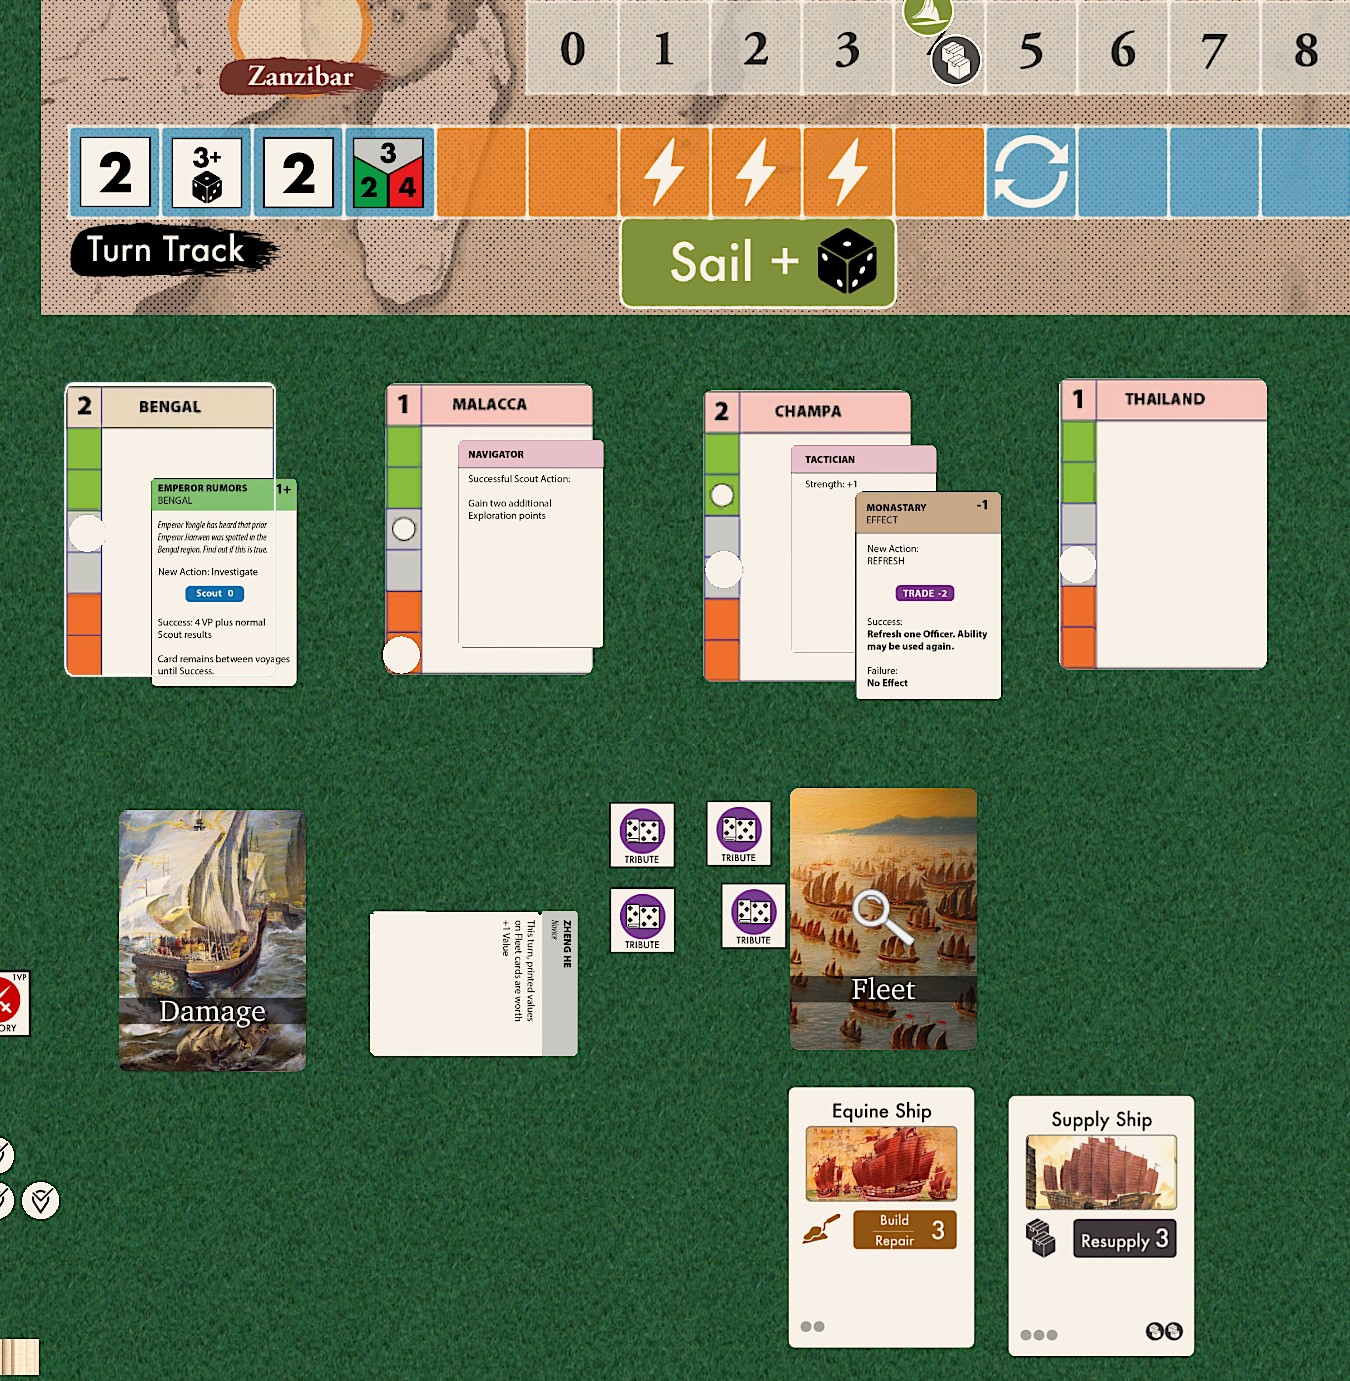
I draw a Supply Ship with Resupply 3. If I get a decent Tianfei next turn, I could potentially both build the base and Resupply.
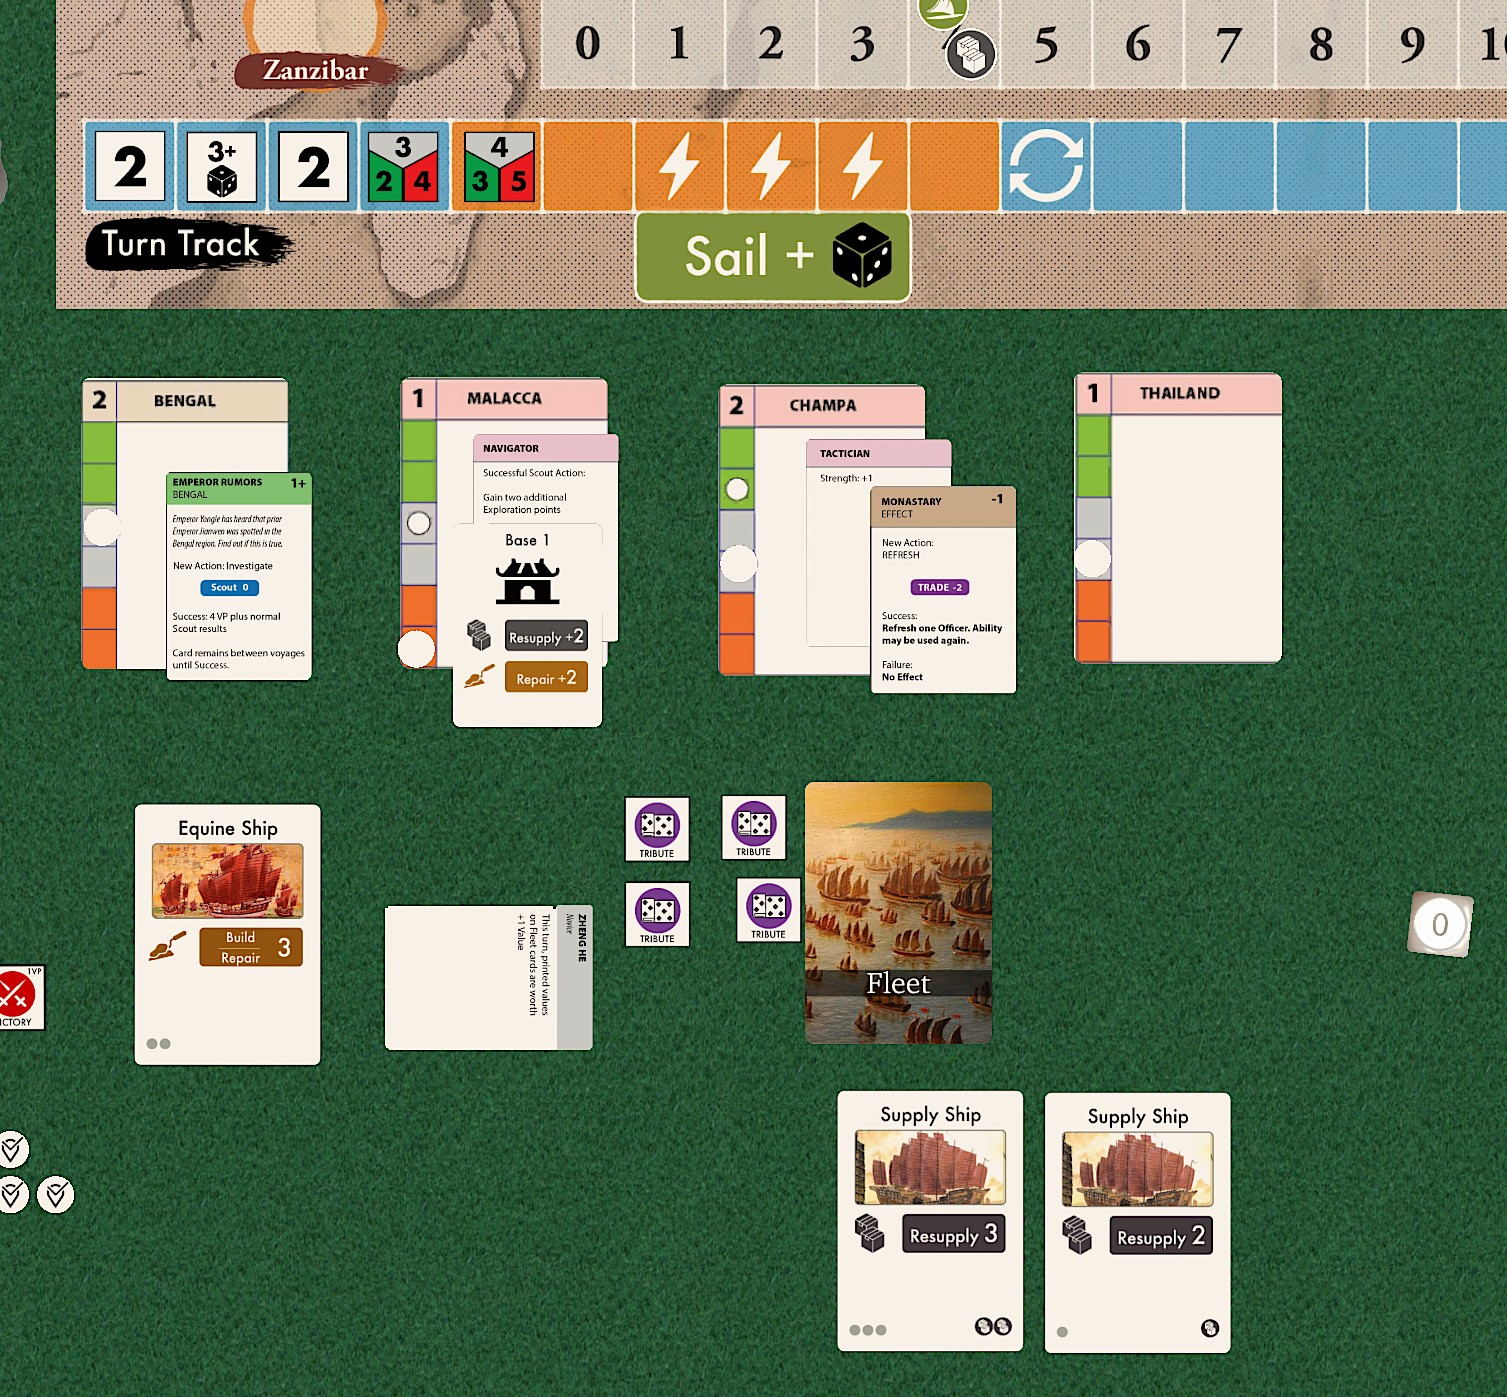
Turn 5:
Tianfei: 3/4/5 (Malacca hates me, so 5).
Of course, a bad Tianfei. But that ‘5’ makes this turn simple. My only real option is to Build the base as my sole Action, as I have 5 Build with my cards. Since there’s no die roll on the Tianfei token, and I’m only taking a one Action turn, I don’t need to roll a die. I just need to meet the 5 target.
I draw a Resupply 2 card at turn end, so I should have no trouble resupplying next turn, since I also have the Resupply 3.
The Resupply Action allows you to draw cards equal to your Supply rating (4 in this voyage). If there is a level 1 Base in the Port you draw two extra cards—three extra cards for a level 2 Base, which I can get by doing another Build action in Malacca in the future.
Bases persist between voyages and are essential to get enough cards to reach Arabia and Africa later in the game.
Previous Article: Zheng He Playthrough with Geoffrey Engelstein Part 1


Shaping up as a very interesting game. Eager to see more of the play and the game.