

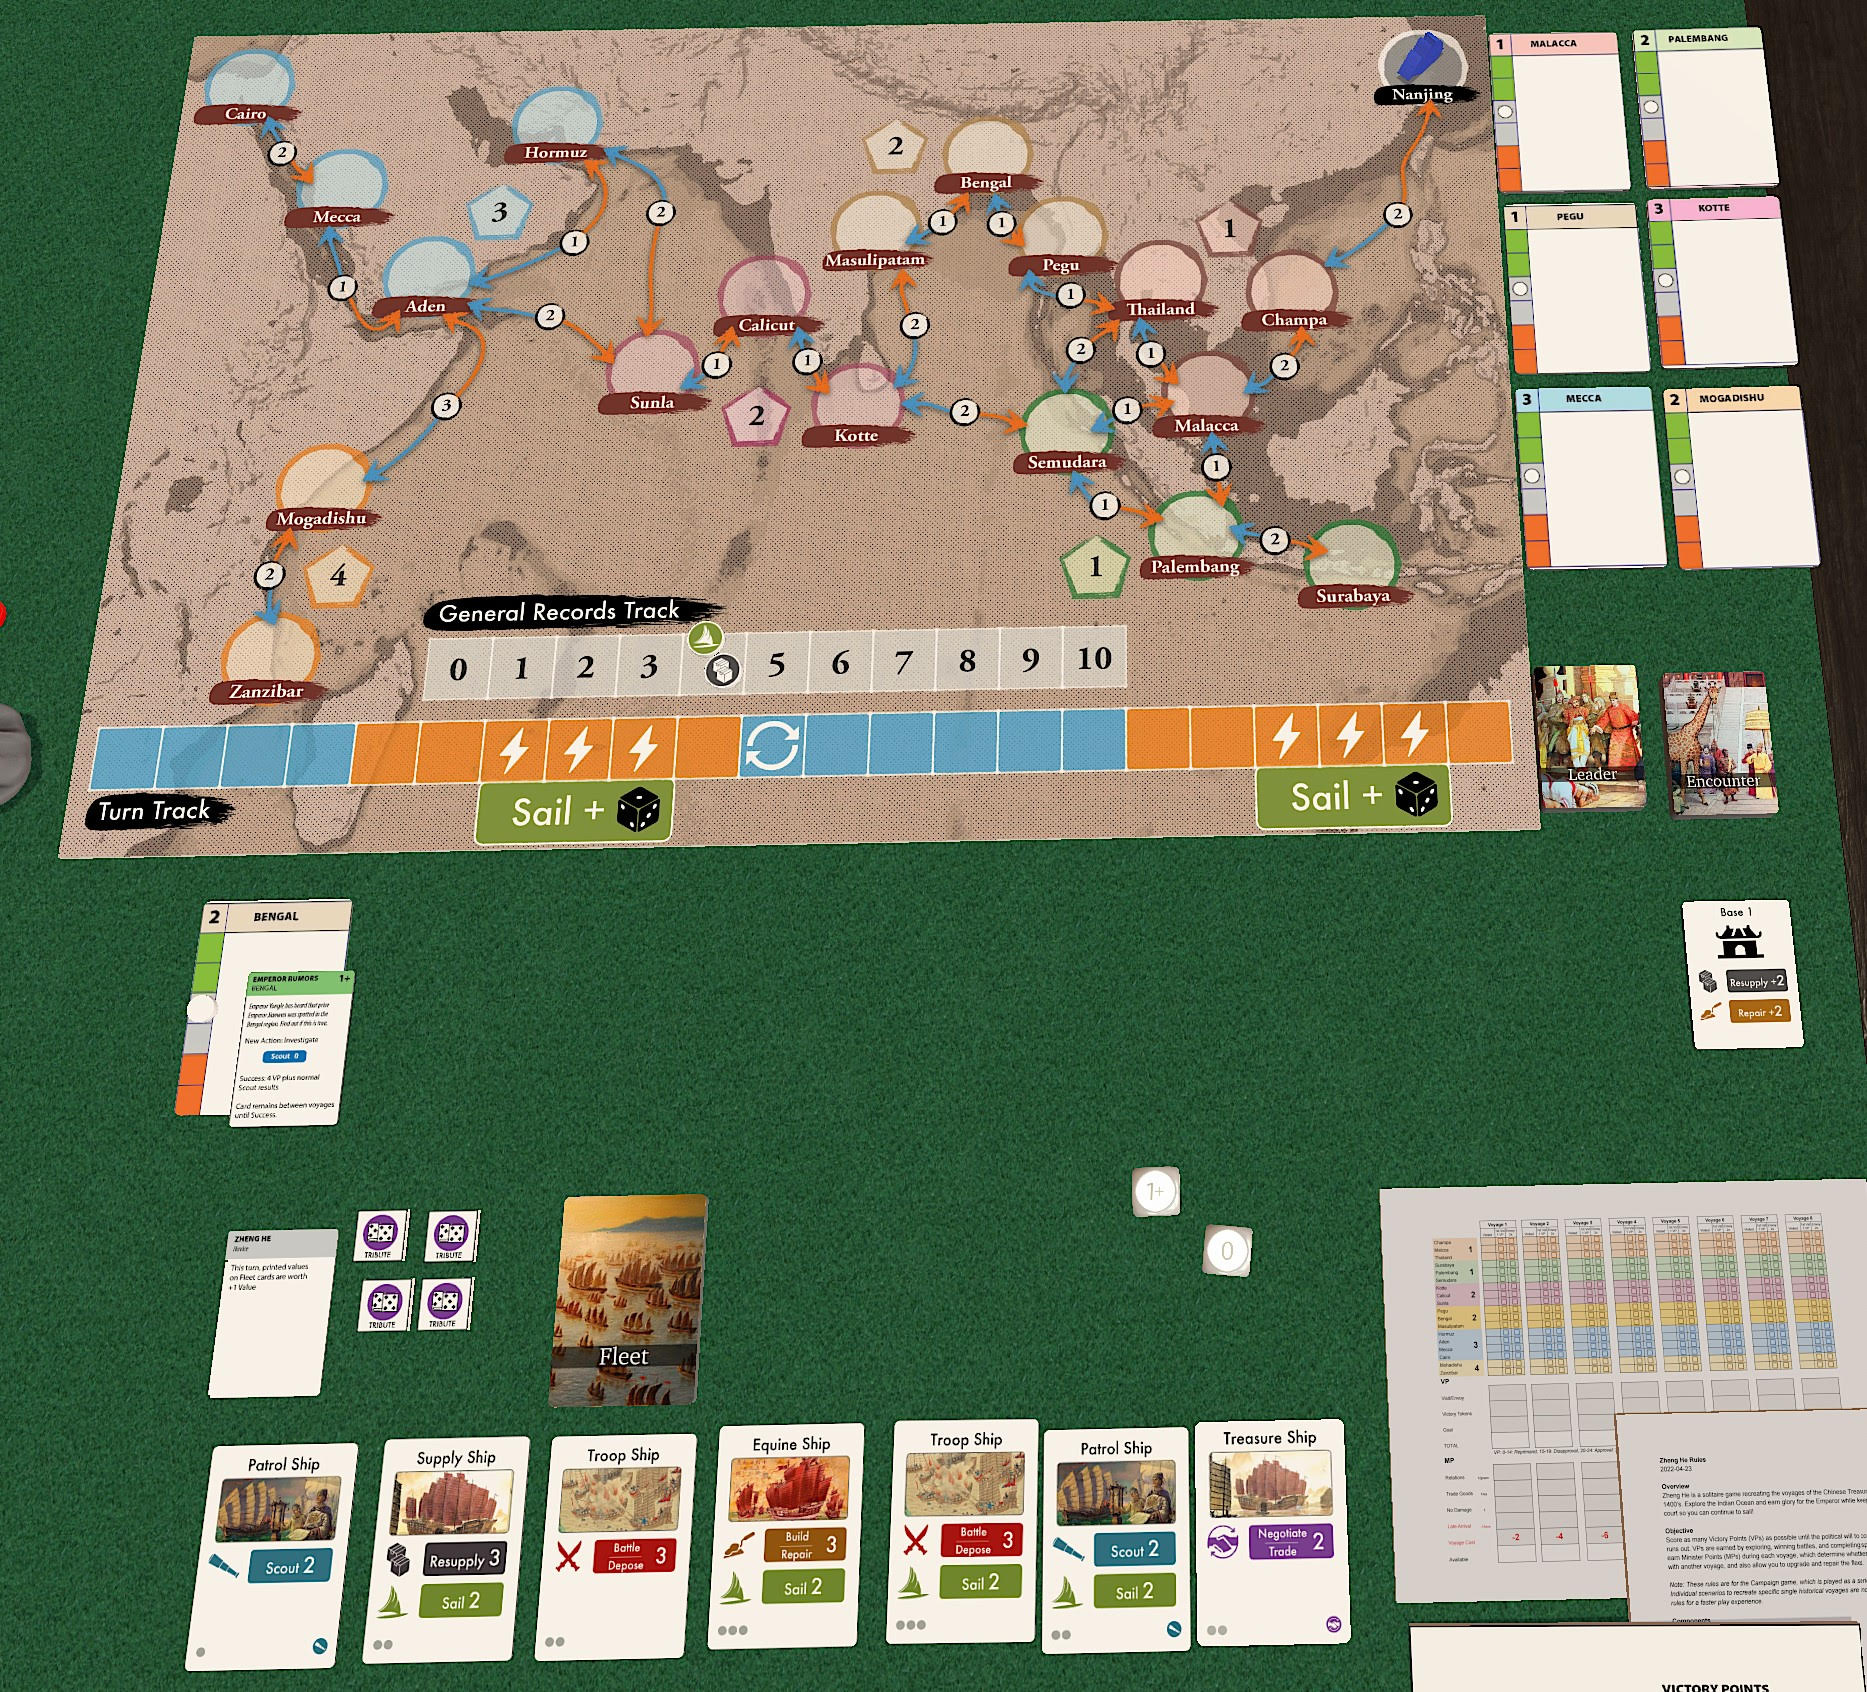
Welcome to this playthrough of the first voyage of Zheng He: Admiral of the Ming Voyages, currently on P500 and designed by myself (Geoff Engelstein) and David Thompson.
Earlier articles (here and here) give an overview of the history of these voyages and how we represent that in the game. But to give a quick overview, in 1405 the Ming Emperor Yongle launched the first of what would be seven voyages of a massive fleet of over 200 ships and 25,000 people to the Indian Ocean, led by his childhood companion Zheng He.
During the game you recreate these voyages, earning both Victory Points (which represent the emperor’s favor and ultimately determine whether or not you win the game) and Minister Points (which measure your relations with the ministerial council and how motivated they are to fund your voyages in the future).
A voyage is played over a maximum of 22 all-too-brief turns, during which you have to score as many Victory and Minister points as you can, before returning home.
Before starting the replay, let’s go over how you score Victory and Minister points.
Victory Points
Visiting a Port: The map is broken up into 18 ports, each of which is in a Region. If you visit a port during a voyage, you gain VP equal to the Region Value, which ranges from 1-4 depending on how close the Port is to China. In addition, if it is the first time you have ever visited a Port on any voyage this campaign, you gain an extra VP.
Getting an Envoy: As mentioned above, one of the big goals of these voyages was to extend the Chinese Tribute system into the Indian Ocean. This is represented by gaining Envoys. The Negotiate Action can improve your relations with a Port. But if it is extra-successful you also gain an Envoy. Envoys grant you VP equal to the Region value of the Port.
Gaining Victory Tokens: Certain Actions and Encounters involve the use of military force. If these succeed, you gain a Victory Token, each of which is 1 VP.
Completing the Emperor’s Goal: On each voyage you randomly select a Goal Card, which gives you a mission that the Emperor wants you to complete. If you succeed, you gain the Victory Points indicated on the card.
Minister Points
Good Relations: Each port can either have Good, Neutral, or Bad relations with China. At the end of each voyage you gain 1 MP for each port with Good Relations.
Trade Goods: Various Actions and Encounters allow you to gain Trade Goods. Each Trade Good token you acquire is worth 1 MP at the end of the voyage.
Fleet Damage: If you bring the fleet back with no damage you gain 1 MP.
Late Return: If you don’t return to Nanjing (your starting port) by the last turn, you lose MP based on how far away you are. You don’t want people to worry!
Setup
Setting the game up is very simple. Your fleet is represented by a deck of cards, and you begin with the 20 Starter cards. Shuffle those and draw seven as your starting hand.
You also start with four Tribute tokens and mark your Supply and Exploration ratings (both four) on the Records track.
Finally, you shuffle the Goal cards and draw 1. In this case, I have drawn Emperor Rumors: Bengal. There have been rumors that the deposed Emperor Jianwen has been seen in Bengal, and you need to investigate. Completing this goal will score me 4 VP.
Side Note on VP: In the Campaign game, overall victory is determined by cumulative VP across all voyages, but each individual voyage has key VP targets. If I score fewer than 15 VP, the emperor will Admonish me, and the campaign immediately ends. If I score 15-19 points, the result is Absence of Praise, which basically counts as half of an Admonish (if I get a second on a future voyage, the campaign ends). If I score between 20 and 24 VP, the Emperor is pleased with my performance, which has no game impact. If I score 25+, I receive the Gratitude of the Emperor, which cancels out a future Admonish.
Each Port has a card to track the Relations and other information. We’ll come back to that later. So I take out the Bengal Port card and place the Goal card on top of it to show that it is available if I travel there.
I place my fleet mini in Nanjing to start.
Now I am ready to start!
Turn 1
The first thing I do each turn is draw a Tianfei token, which determines how challenging Actions will be.
Note on Tianfei Tokens: In Chinese mythology of this period, the goddess Tianfei protected sailors. Many of the inscriptions and monuments left by Zheng He are dedicated to honoring her and asking her to protect the fleet.
There are three ‘flavors’ of Tianfei tokens. The first type simply has a number. The second shows a number plus a die symbol, and the third shows three numbers on a green, gray, and red background.
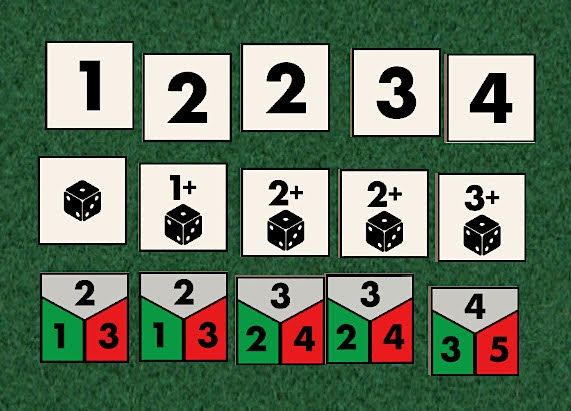
When you do an Action, you play one or more Fleet cards to meet or exceed the Tianfei target. If it shows a die, you then roll a die after selecting the cards you want to play. This is a special die with sides 0, 0, 0, 1, 1+, and 2+. The 1+ and 2+ sides are ‘exploding.’ If you roll those, you roll again and add the additional roll to the difficulty. That roll may also explode, so there is no ceiling to how high the difficulty might be.
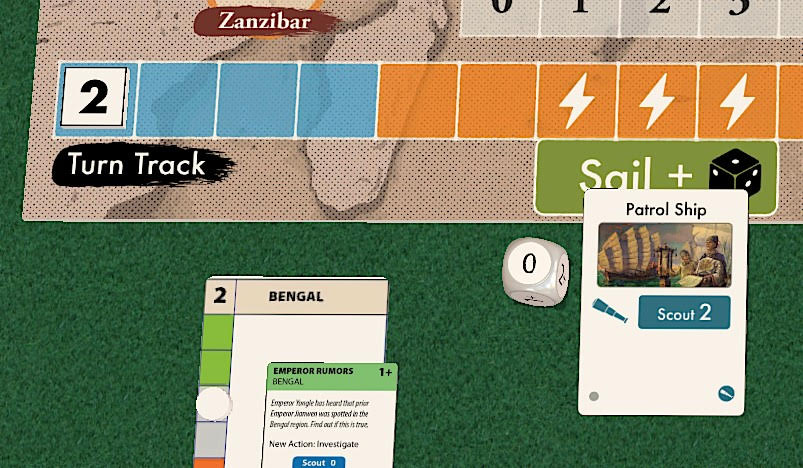
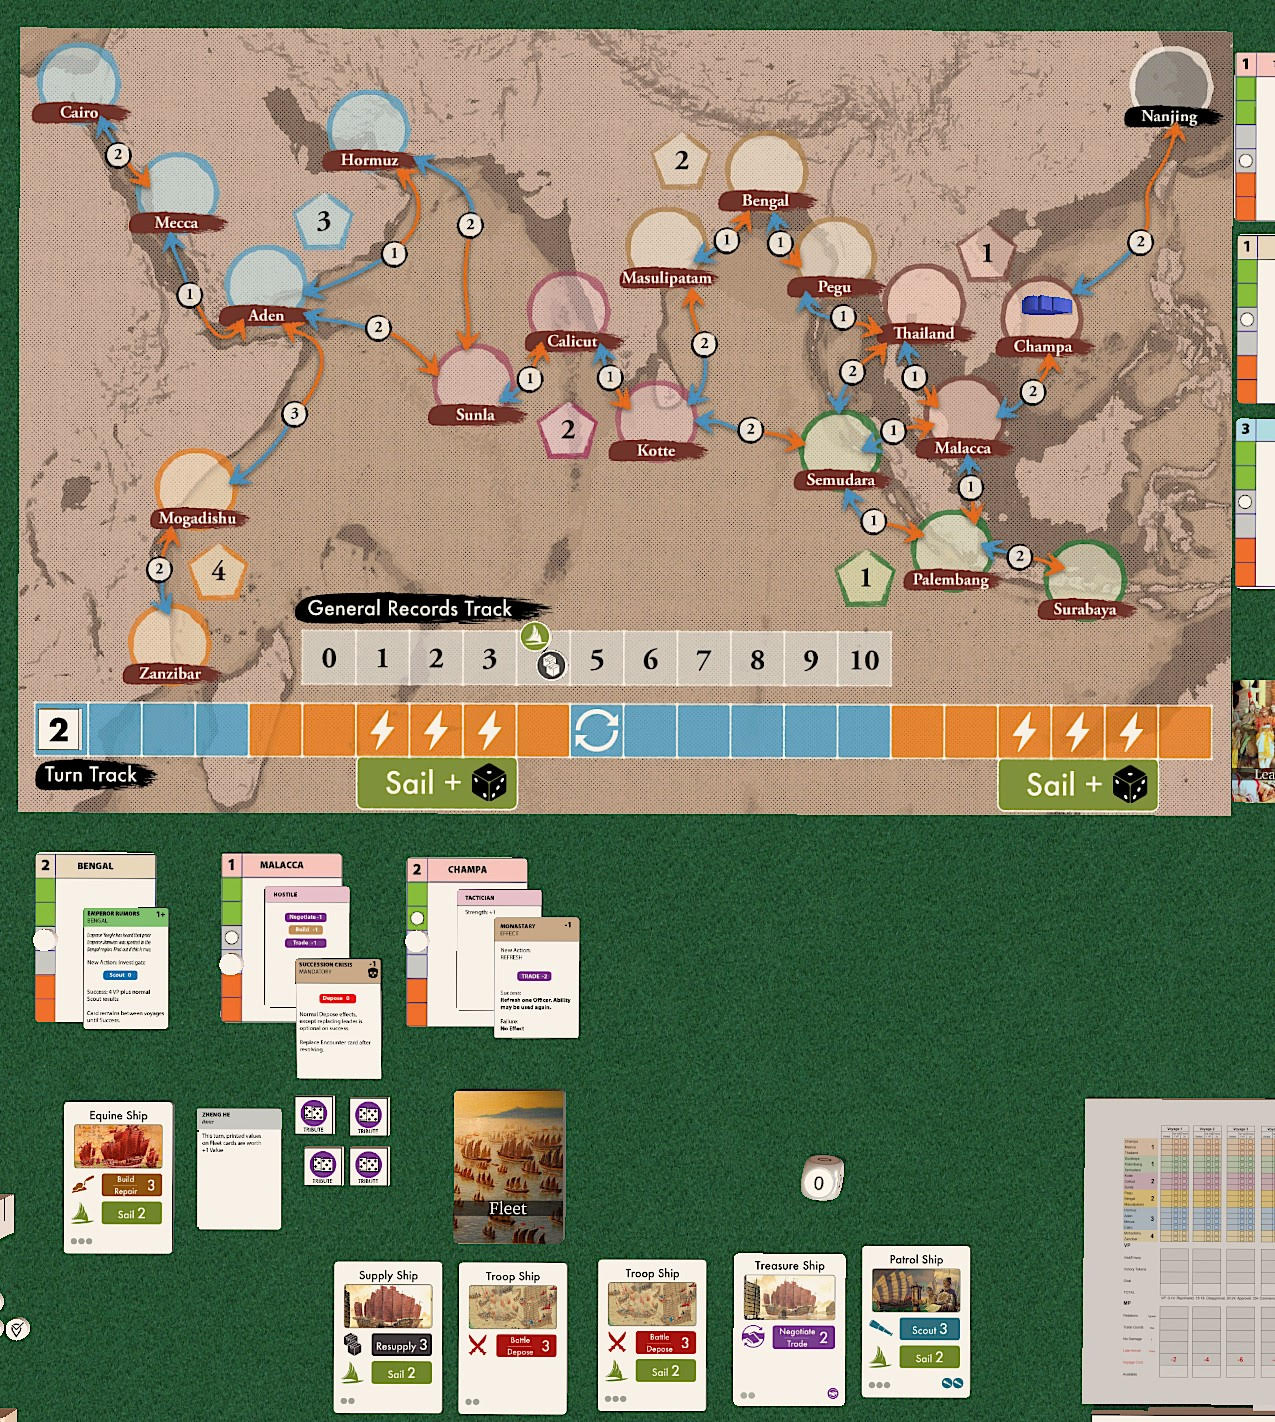
For turn 1, I draw the Tianfei ‘2’ token, which is one of the most favorable. I place it on the first space of the turn track to record which turn I am on and as a reminder of which tokens I’ve drawn already.
Each turn you have three options: you can take zero, one, or two Actions.
- Zero Actions: If you choose zero Actions, you take zero actions and draw an extra card at the end of the turn.
- One Action: The ‘1 Action’ option is just a normal turn. You use whatever the Tianfei token says as the target for difficulty checks and perform one action.
- Two Actions: If you choose the 2 Action turn, you add a die roll to the Tianfei target for each Action. If it already has a die roll on the token, you have to make two die rolls.
Since I got a good Tianfei token draw, I decide to perform two Actions. They could be two different Actions or the same one twice. Since I am doing two, I will need to roll a die for each after I select which cards I will use.
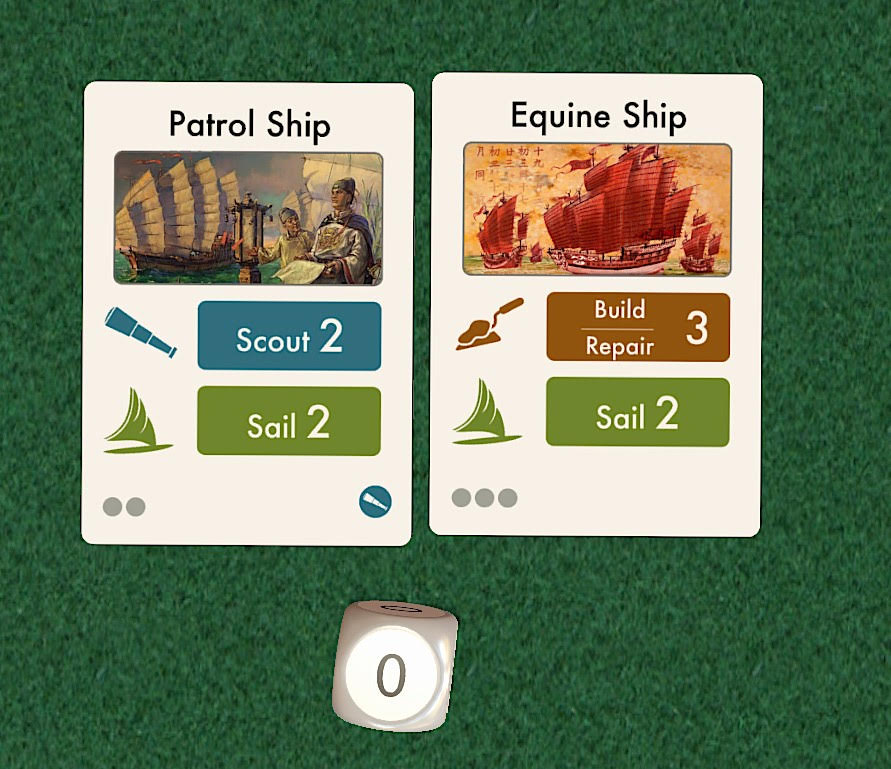
First Action: For the first action I decide to Scout, which lets me learn what is in Ports before I arrive. I could just sail in, but there are some Encounters that are mandatory (like Ambush) that are not great to just discover when you arrive.
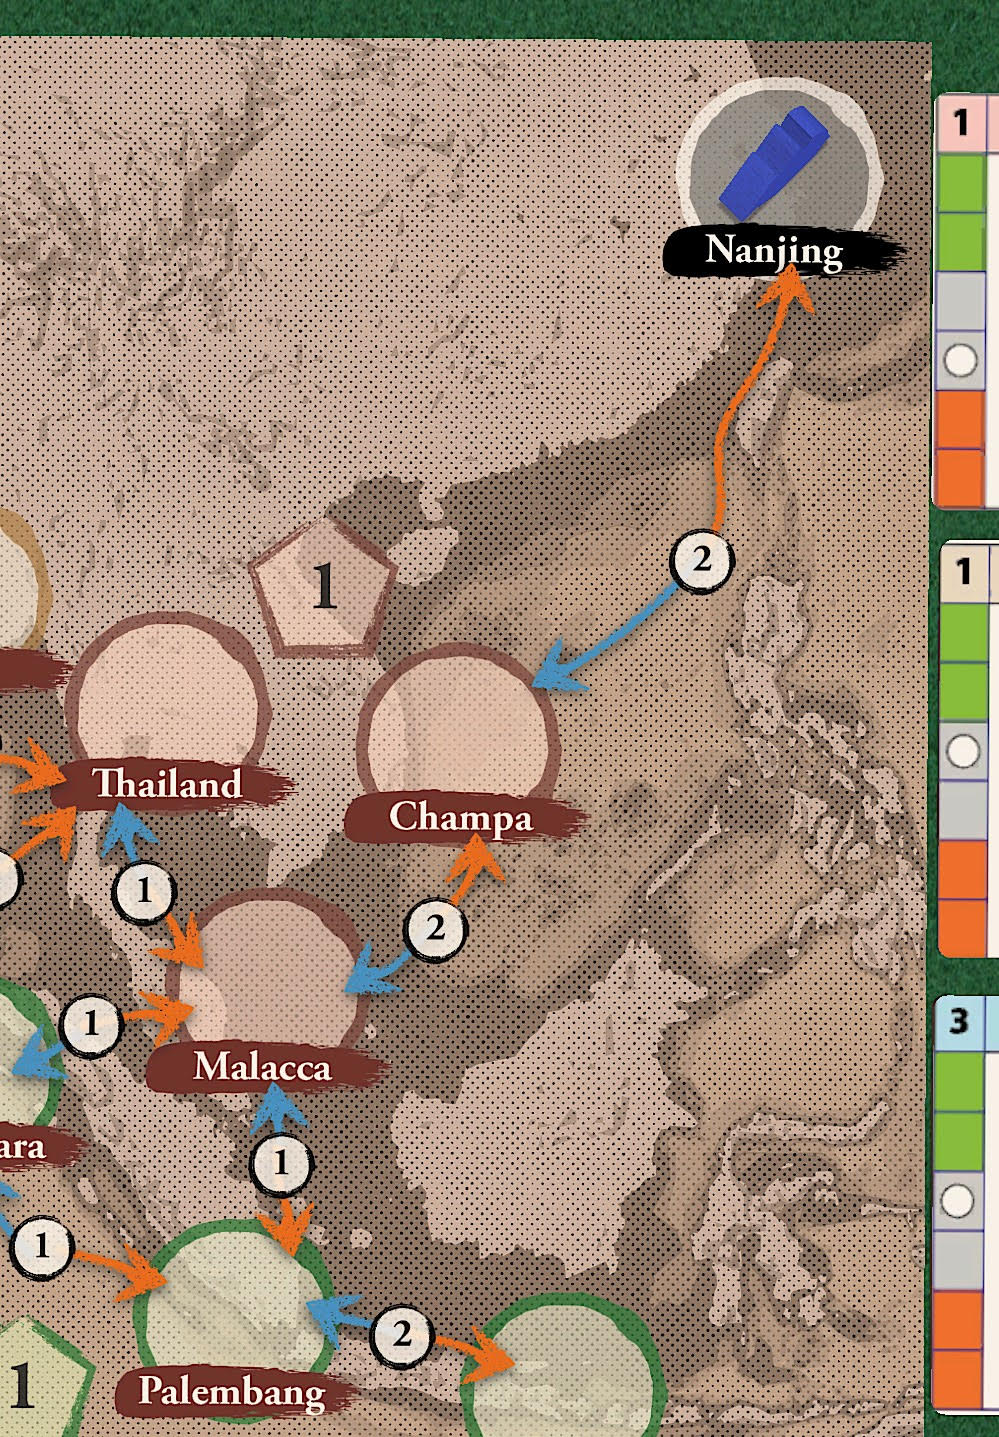
When you succeed in scouting, you get to spend Exploration Points up to your Exploration rating. If I successfully Scout, I get my 4 Exploration rating to spend, but if I fail, I have to reduce it by one for each point I fail by. I just need 3 Exploration points to scout Champa (modern day Vietnam) and Malacca (modern day Malaysia) because they are respectively 1 and 2 spaces away from my fleet mini, which adds up to three. The fourth point from my Exploration rating doesn’t help since I’d need three more to see anything adjacent to Malacca (three spaces from Nanjing). So, I decide to use one Scout 2 card because I have a pretty good chance of getting at least 3 exploration points to spend.
I roll a zero! So, the Tianfei token of two plus the die roll from taking two actions this turn yields 2+0 for a target of 2. This equals the scout strength of 2 from my Patrol Ship card, which means I succeed. I use 3 Exploration points to look at Champa and Malacca.
When you first scout or sail into a Port you draw an Encounter card and a Leader card. Both modify the conditions in the Port and may give you additional actions, bonuses, or penalties for certain actions, or other effects. In addition, the number in the upper right changes the starting Relations. So both are moved down by one box. Some cards show a skull as well. These are used in later voyages to see if the leader from the previous voyage is still there or a new one is drawn.
Champa has a Monastery, and the leader (pink card) is a Tactician. Monastery would let me refresh my officer Zheng He’s special ability—but I’m not going to use it this early, so that doesn’t really help.
Officers give you once-per-voyage special abilities. For the first voyage you only have Zheng He, who increases all Fleet card values by one on the turn he is used. You can add other officers to your fleet in between voyages by spending Minister Points.

Malacca, on the other hand, is interesting. There’s a Succession Crisis, so I must take a Depose action after I get there. The leader is Hostile, so I’d probably want to get rid of them anyway. I could skip Malacca if I don’t want to deal with all of this, but it’s a good central place for my first Base, so I kinda need to deal with it. Bases make Resupply Actions more effective, which is the main way to draw new cards.
Relations with both Ports drop by 1 (shown in the upper right corner of the Encounter card), so both are in the neutral Gray region. I need to get them to Green to score a Minister Point at voyage end.
Second action: With my second action, I decide to Sail to Champa.
When you do a Sail action, you add the Distance (the number in the connecting sea lane) to the Tianfei number. In addition, monsoon winds were very important to travel timing in this era. Each sea lane has a blue and orange arrow, and each turn on the turn track is either blue or orange. If the direction you are traveling doesn’t match the color of the turn, you are moving against the prevailing winds and add an extra +1 to the difficulty.
If you don’t reach the target number on a Sail, you still make it to the destination. However, you add one damage card to your deck for each point you are short.
The Sail target is 4 due to 2 (Tianfei) + 2 (distance). No additional +1 since I’m sailing with the wind along the blue arrow in a blue turn. I use two cards to bring me to a Sail value of 4.
Because I played two Actions this turn, I have to roll a die and add its number to my target. Luckily, I roll another zero, so I sail into Champa without incident. I mark off Champa on the Voyage Log sheet and gain 2 VP (1 for the region value and an extra +1 for the first visit to Champa of the campaign).

As the last step of our first turn, I Draw a card to replenish my hand a bit and end the turn.
This brings us to the end of part 1 of our 4-part series of me playing through the first voyage of a campaign. There are still 21 turns to go, so I hope you’ll tune in next time to see where this adventure takes me.


