
It did not take me long to bring Commands & Colors: Samurai Battles to the table for another face-to-face session. The recently unboxed game makes really great impression – both from aesthetic but also game-play point of view. The initial AAR of Arita Castle 1517 AD was very well received among Dear Readers, so today I would like to continue with picture-rich session reports, sharing here and there my observations about that position.
The Game
As always, let me provide some more information about the game to those of you who are hearing about this title for first time – or did not have a chance to familiarize more deeply. Above is an unboxing video with game components, below some more info on the theme and rules.
Commands & Colors: Samurai Battles allows players to portray important engagements of Japanese history mainly XVI century. The battles, included in the thick scenario booklet, focus on the historical deployment of forces and important terrain features in scale with the game system. The scale of the game is flexible and varies from battle to battle. For some scenarios, an infantry unit may represent an entire clan of soldiers, while in other scenarios a unit may represent just a few brave warriors.
The game follows the well-proven mechanics of Commands (cards driving the moves and creating Fog of War) and Colors (the units designation, having huge impact on battle results). The dice allow us to quickly resolve all battles and the components in the box allow for creation of countless scenarios. In essence, Richard Borg at his best!
So without further delays, let us move to the session reports!
Okehazama 1560 AD (Border Fort Marune)
Historical Background
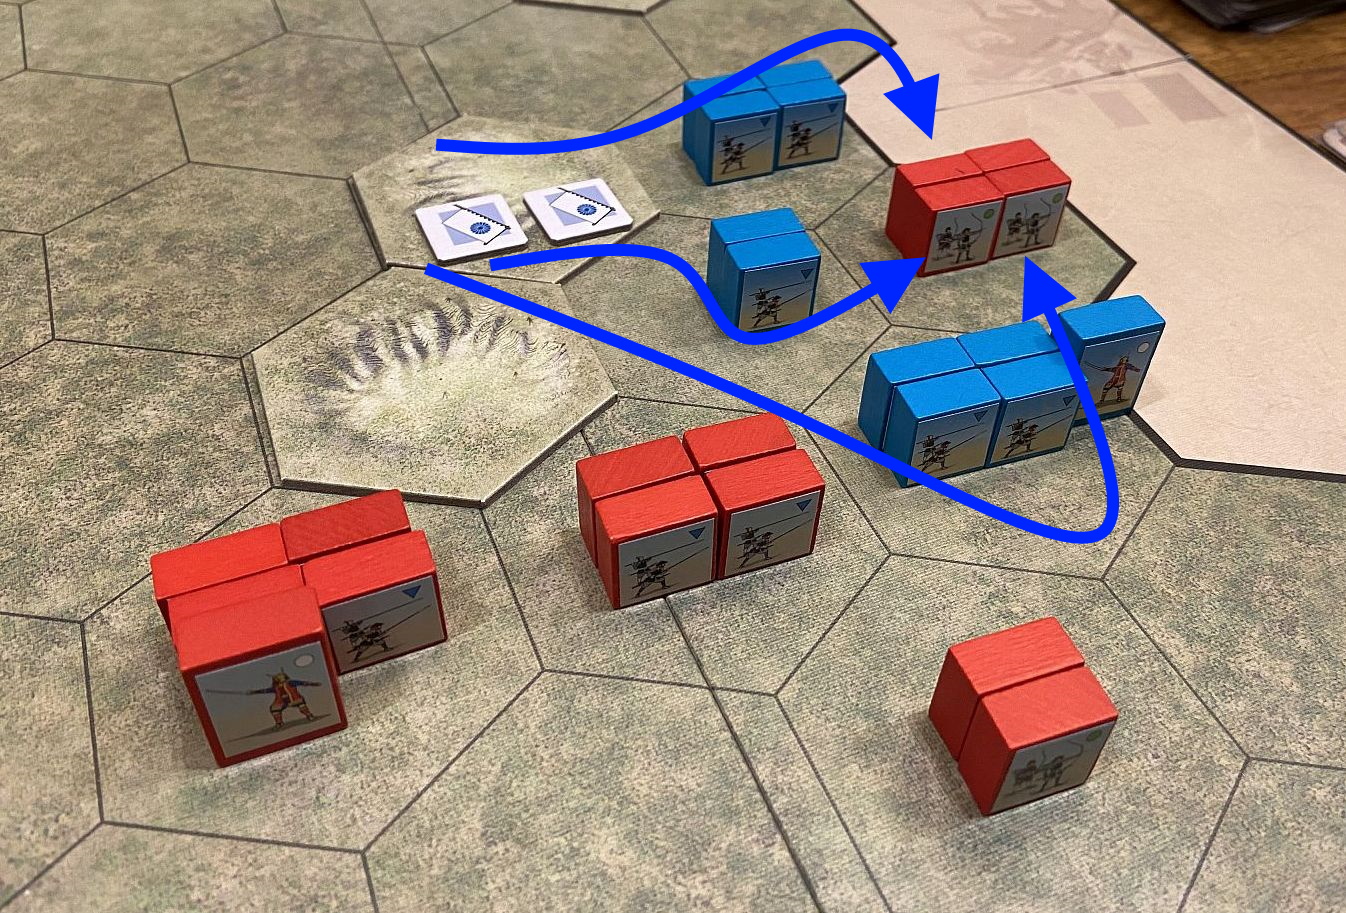
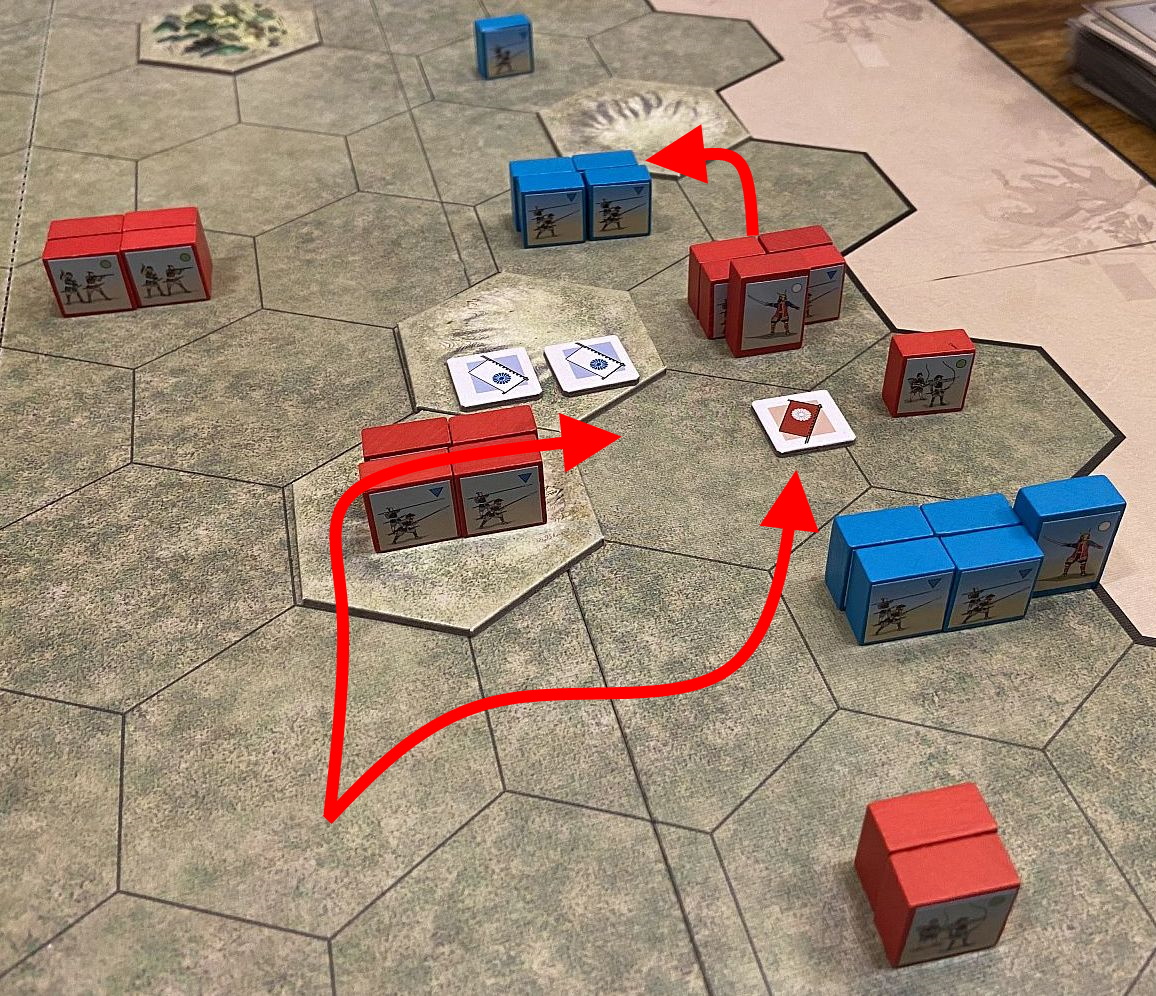
In June of 1560, Imagawa Yoshimoto assembled a large army with a dream of rising above a local daimyo to become shogunate of all Japan. All that stood in his path to Kyoto, Japan’s capital city, was and old rival, Oda Nobunaga. Yoshomito’s first objective on the march was to secure the Oda controlled border forts. He ordered Motoyasu to attack Marune and after a sharp attack against teh fort, Motoyasu retired to a prepared position. The fort’s garrison unwisely pursued the retiring forces and Motoyasu sprung his trap and the garrison force was destroyed and the fort captured.
Session Report
One of the features of my C&C plays is grouping some of the scenarios into the linked, chronological and logically connected sets. This usually means some particular battles being separated into couple of phases.That process can be done based on timeline – as it will be in below example – with battle interlude, main action, and final phase. But the split can be also based on troops location – like overview scenario, left flank, right flank, etc. I find both approaches enjoyable and allowing for much closer familiarization with the particular historical event.
This time I had a possibility to introduce a new player to C&C Samurai Battles – Lukasz. We first played Scenario 1 – the training one, and then plunged into the historical battle of Okehazama. This two-scenarios battle is quite well suited for the introductory games, with both sides having possibility to win at least one engagement. Not to mention it is historically important! Let us see how it went – Michal (Imagawa) vs Luaksz (Oda).
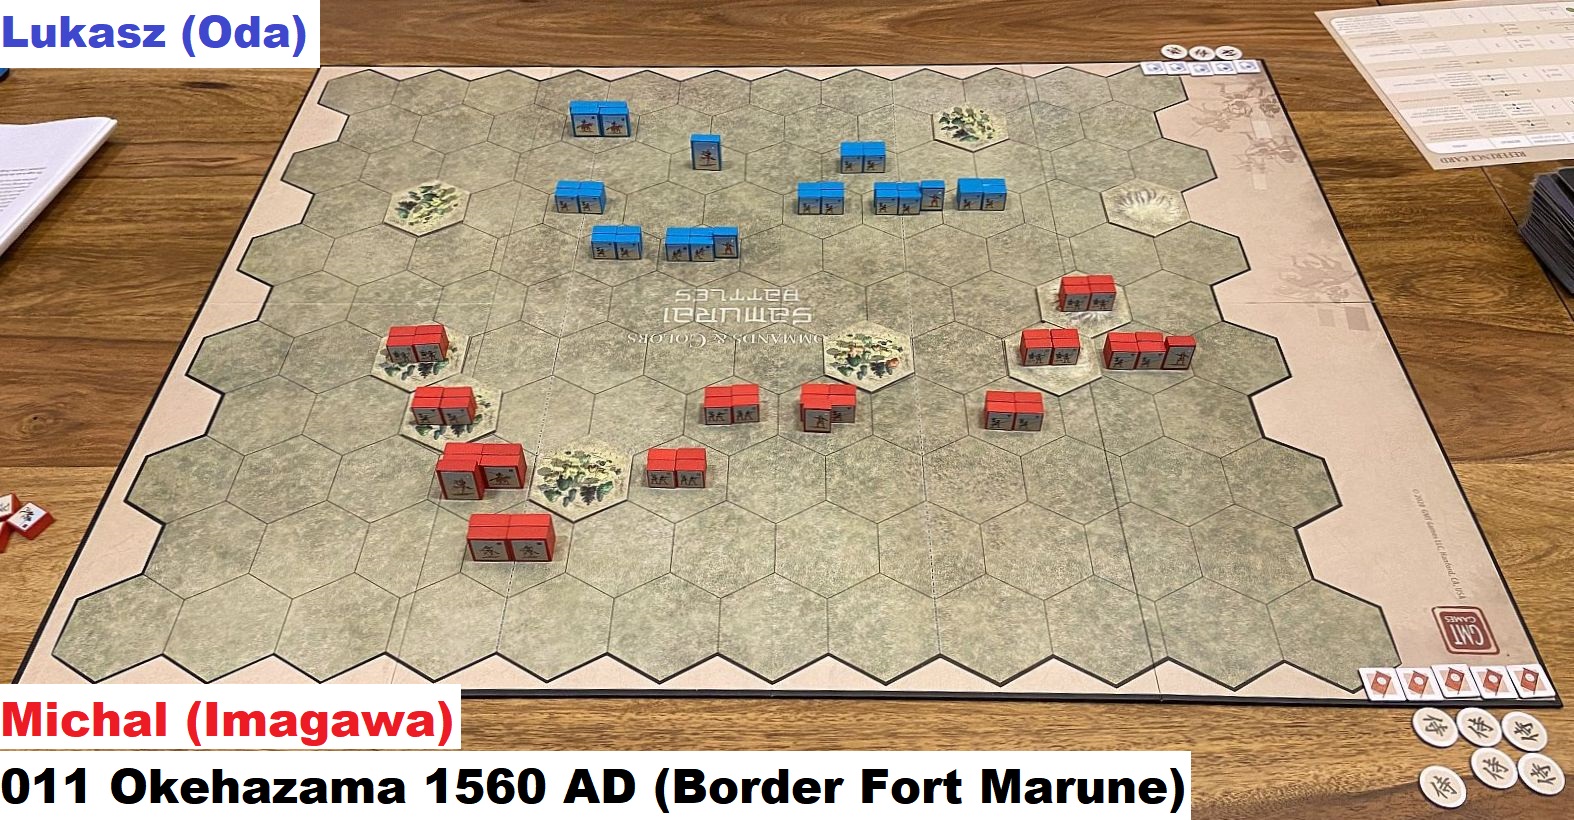


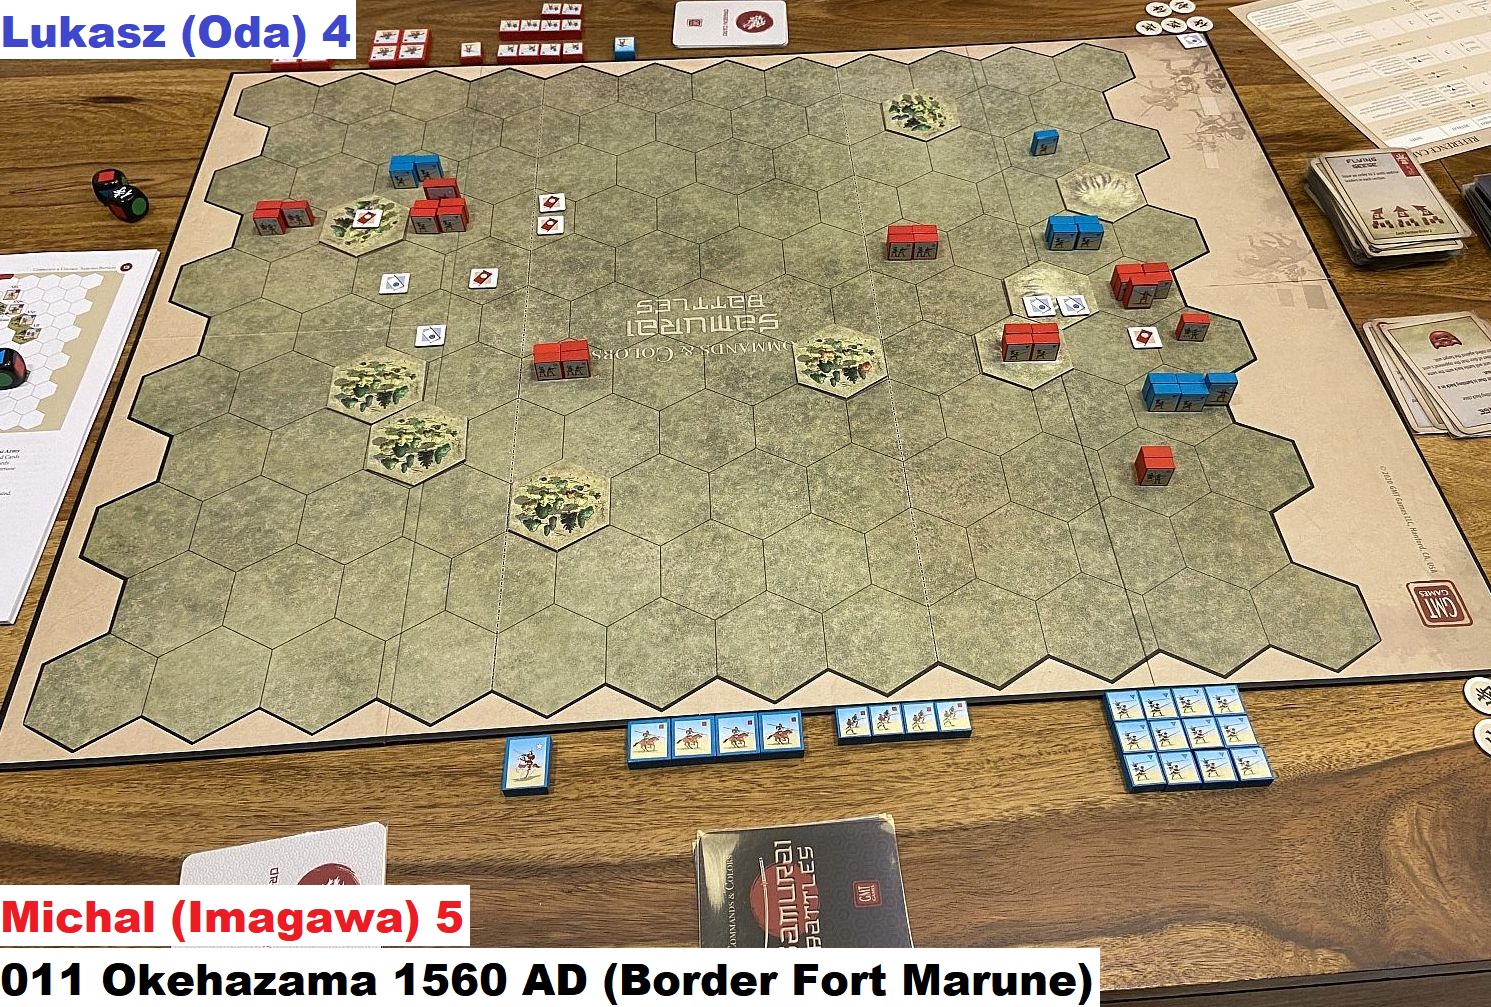
That was supposed to be a piece-of-cake for my forces but transformed into a very close engagement. The death of my leader who was defending the hills was critical here. Fortunately, in the end I managed to achieve the historical result.
Okehazama 1560 AD (Dengakuhazama Gorge)
Historical Background
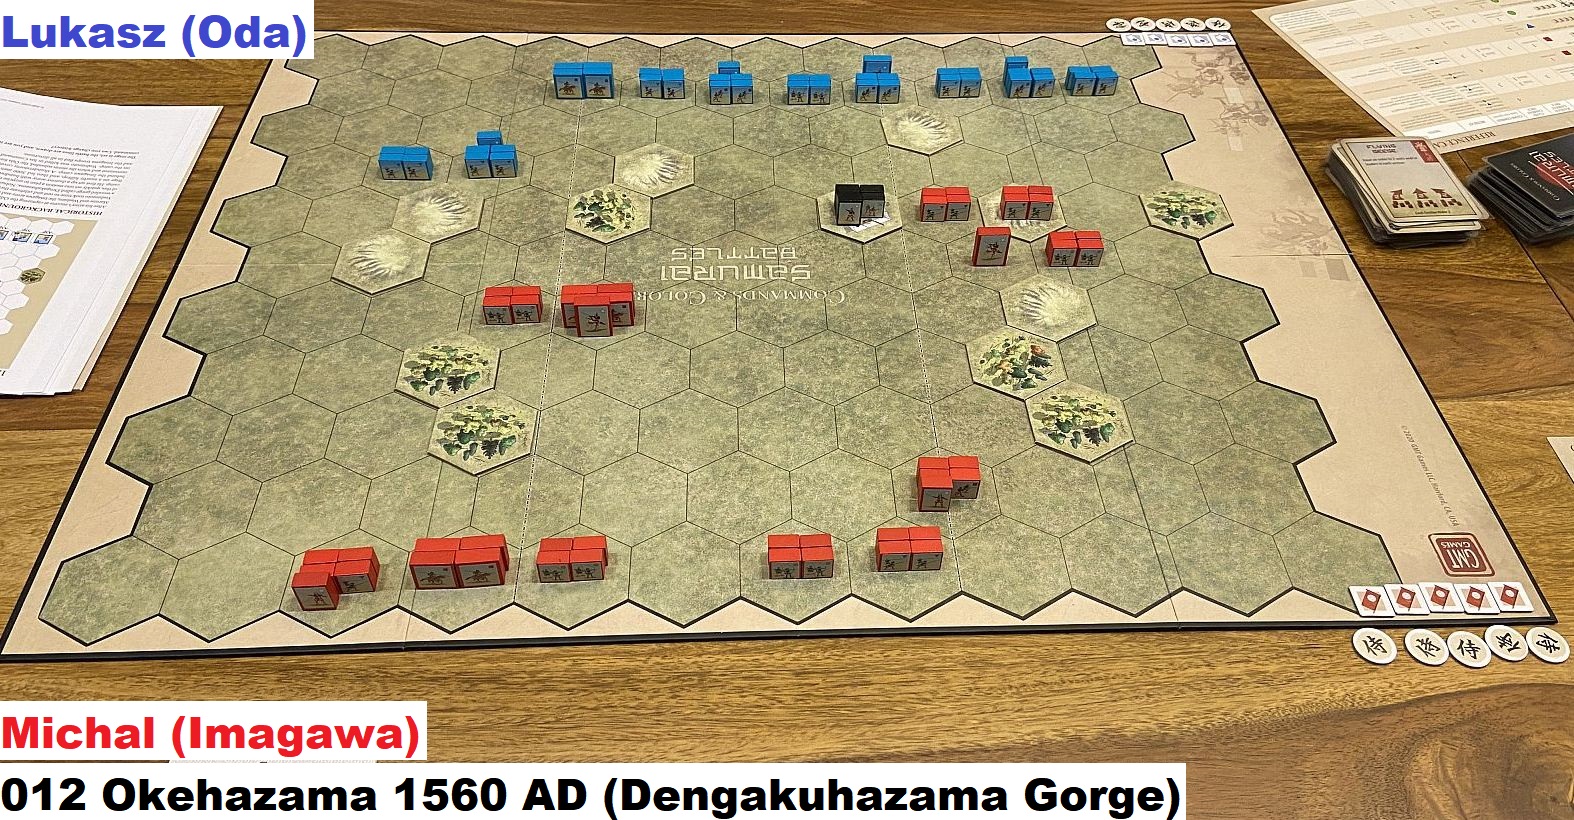
After his army’s success at capturing the Oda border forts of Marune and Washizu, the Imagawa army and its commander Yoshimoto took time to rest and celebrate their victories in a wooden gorge called Dengakuhazama. Nobunaga, hearing of this, quickly set into motion a plan to surprise the enemy’s camp. He first set up a dummy army with hundreds of Oda flags on a nearby hilltop, and then let 3000 men around behind Imagawa camp. A thunderstorm covered his movement and when the storm subsided, the Oda force fell on the camp. Yoshimoto was killed in his command tent and the Imagawa troops fled in all directions.
Session Report
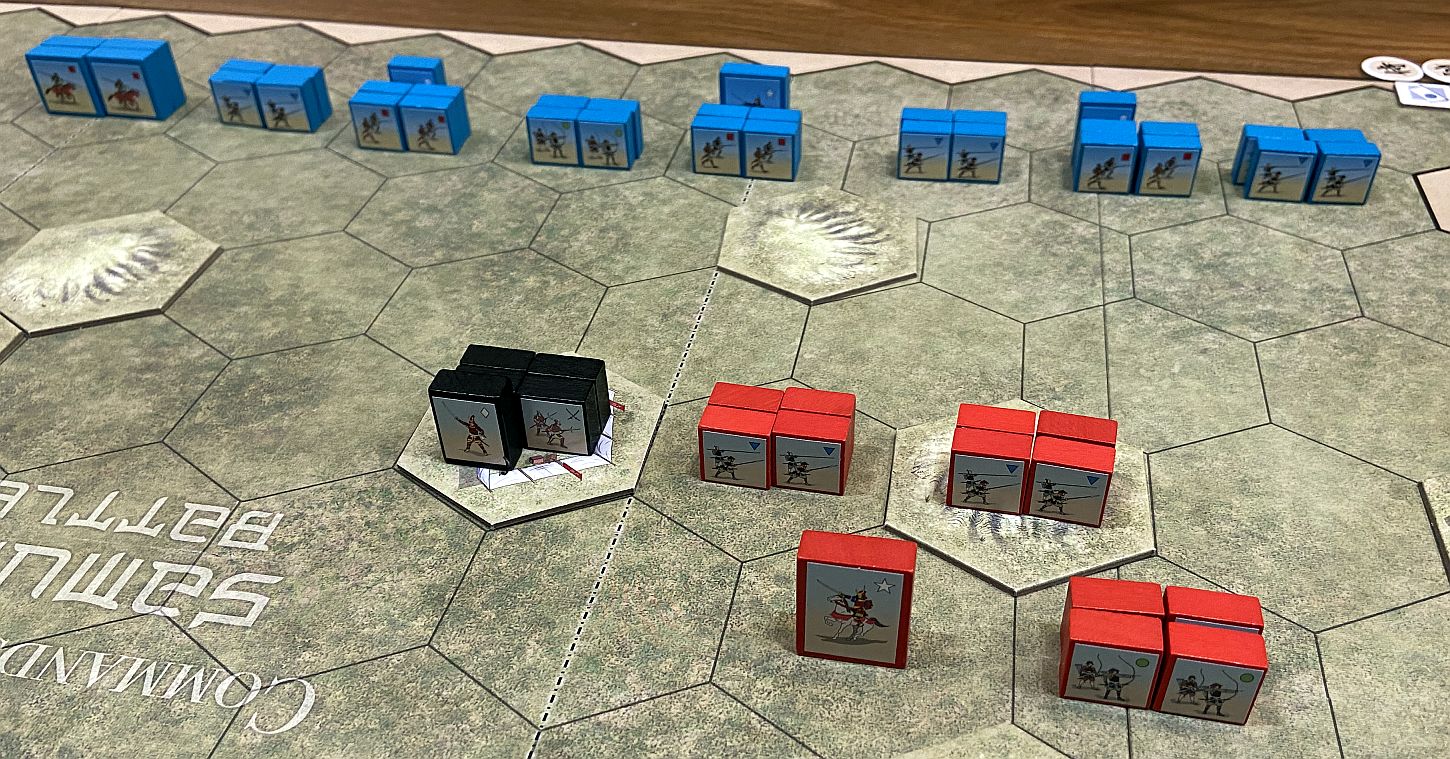
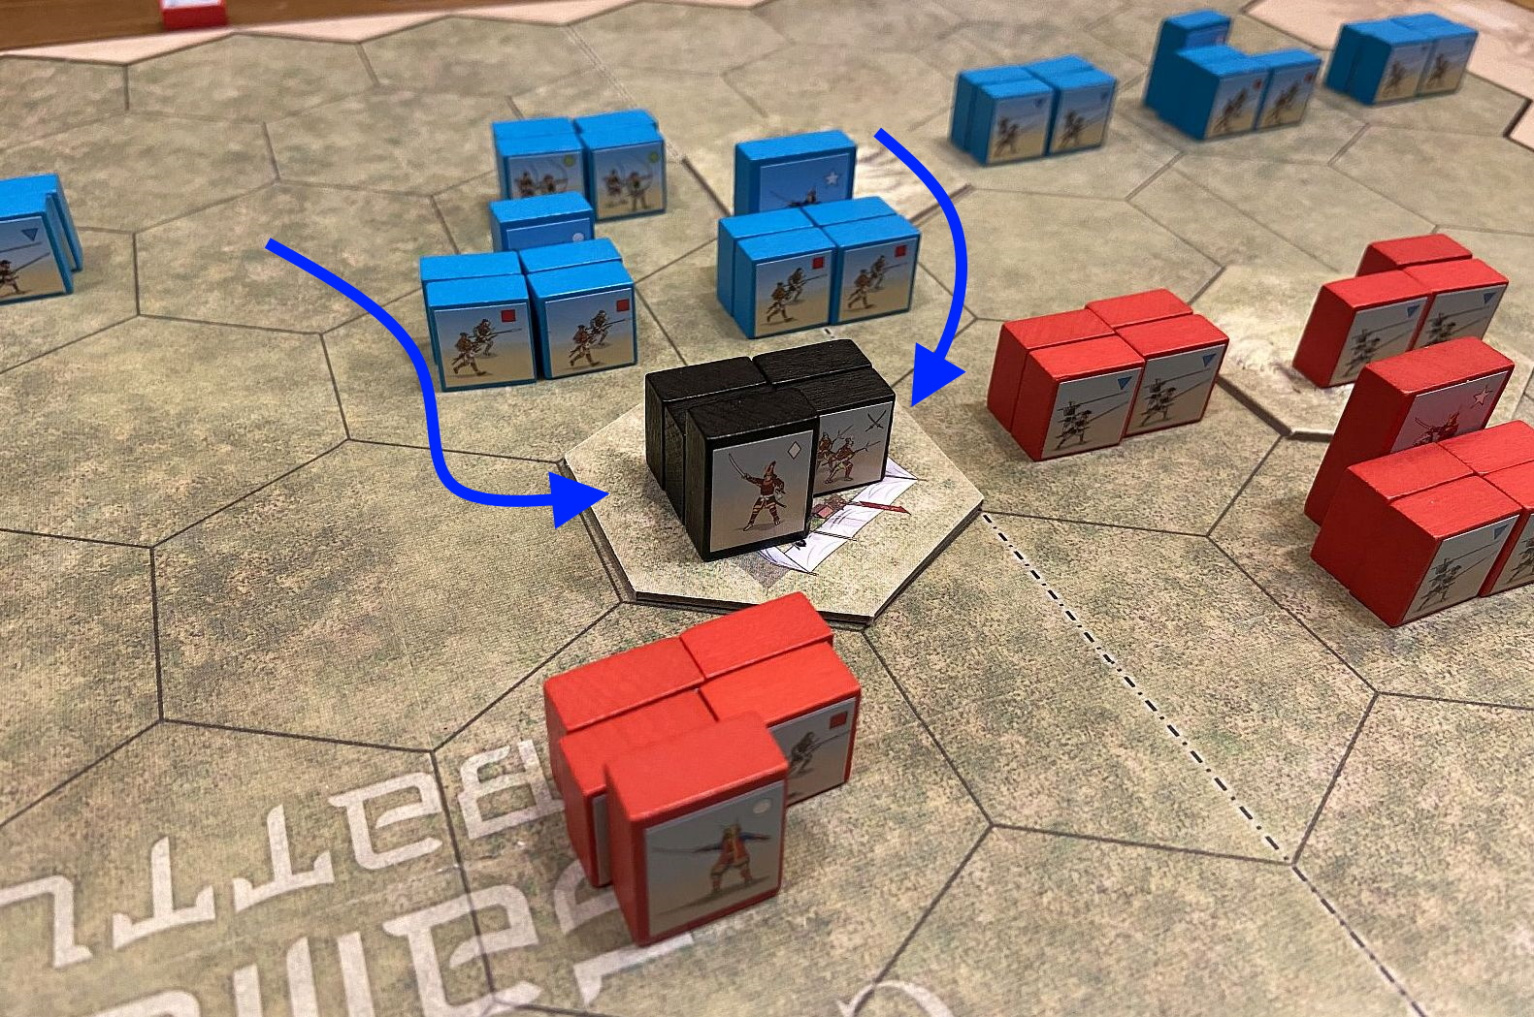
The second part of Okehazama is a true race with time. You can see below in the set-up how my leader tent is exposed to a quick and decisive attack from Lukasz forces. I have pretty good troops but the majority of them is far away, at the baseline. Who will prevail?


Summary
I am so glad another of my friends was hooked by C&C: Samurai Battles.The results were of secondary importance, the fun from game – a top priority. While the game is probably a medium-complexity Commands & Colors position due to second deck, it is also pretty suitable for the new players.
The final score: Michal (Imagawa) 6 – Lukasz (Oda) 9. A defeat but an expected one – both scenarios finished historically although was a true thriller in the end. More reports will come – stay tuned!

Author: The Boardgames Chronicle
